Diacritics and Accents
A diacritic is a mark added to, or combining with, a letter, often used to change the sound value of the letter to which the mark is added. Some diacritical marks (such as the ‘acute’ and ‘grave’) are often called accents. Diacritical marks may appear above or below a letter, within it, or between two letters.


Some examples of diacritics
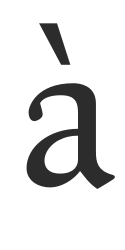
Lowercase ‘a with grave’ (unicode u+00e0). Created in a font by combining the lowercase ‘a’ glyph (unicode u+0061) and the ‘combining grave accent’ glyph (unicode u+0300).
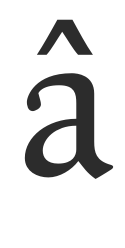
Lowercase ‘a with circumflex’ (unicode u+00e2). Created in a font by combining the lowercase ‘a’ glyph (unicode u+0061) and the ‘combining circumflex accent’ glyph (unicode u+0302).
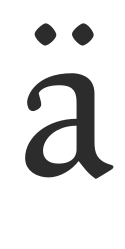
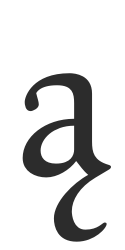
Lowercase ‘a with ogonek’ (unicode u+0105). Created in a font by combining the lowercase ‘a’ glyph (unicode u+0061) and the ‘combining ogonek’ glyph (unicode u+0328).
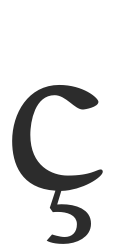
Lowercase ‘c with cedilla’ (unicode u+00e7). Created in a font by combining the lowercase ‘c’ glyph (unicode u+0063) and the ‘combining cedilla’ glyph (unicode u+0327).
Lowercase ‘o with double acute’ (unicode u+0151). Created in a font by combining the lowercase ‘o’ glyph (unicode u+006f) and the ‘combining double acute accent’ glyph (unicode u+030b).
FontForge can automatically create accented characters in two main ways.
- FontForge contains rudimentary information on where to place diacritic marks, so can automatically build most accented characters.
- For much greater control of diacritic placement, FontForge can place diacritic marks based on the position of user-created anchor points.
It should be noted here that if you are not using anchors and lookup tables to position diacritic marks, then, if the glyph of a particular diacritic mark is not present in your font, FontForge will instead use a similar spacing character in place. For example, if the combining mark 'acutecomb' (u+0301) is not present, then FontForge will use the standard 'acute' (u+00b4) character when it automatically builds any acute accented glyphs. If the 'acutecomb' is present, then FontForge will always use that, unless you specifically force FontForge to use spacing characters for building accented glyphs.
FontForge’s basic auto placement of diacritic marks
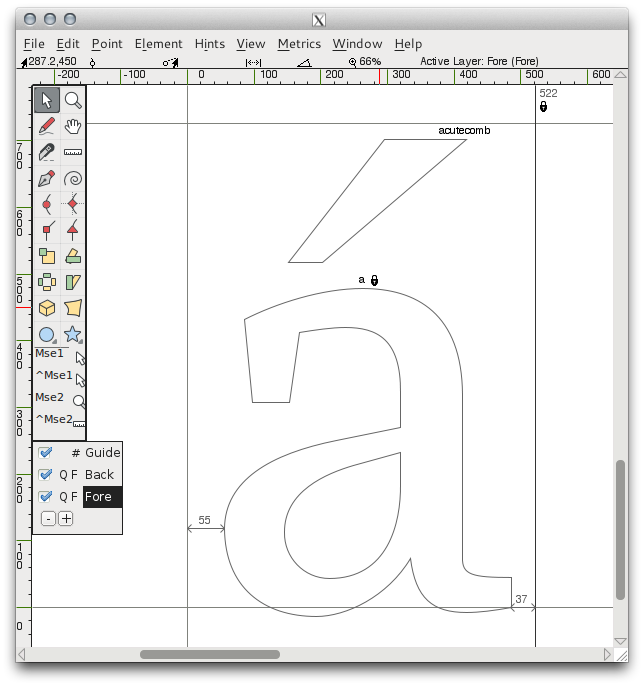
In FontForge’s ‘Element’ menu is a ‘Build’ function that can be used to create accented characters, certain composite characters, and some duplicate characters. To auto-build accented characters, FontForge uses the ‘Element > Build > Build Accented Glyph’ function. This function can also be performed with the keystroke Ctrl + Shift + A. So, using the example of building the ‘a acute’ character (u+00e1) , we would need to have already created the lowercase ‘a’ (u+0061) and the ‘acutecomb’ glyph (u+0301). Then selecting the ‘a acute’ character slot and using the ‘Element > Build > Build Accented Glyph’ function, FontForge will place a reference to the lowercase ‘a’ glyph and a reference to the ‘acutecomb’ glyph into the ‘a acute’ character slot (see below).
This automatic placement of diacritic marks can be tuned by preferences, found in the ‘accents’ section of FontForge’s preferences menu ‘File > Preferences > Accents’ (see below).
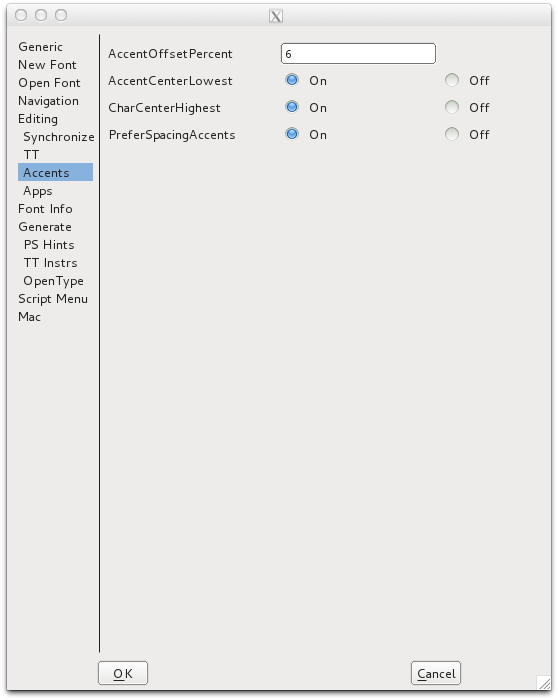
‘PreferSpacingCharacters’ will force FontForge to build accented glyphs with spacing characters even if the appropriate combining characters are present. This option is ignored when using anchors to position diacritic marks.
‘AccentOffsetPercent’ controls the amount of vertical space between the base glyph and the mark glyph. The value entered here is a percentage of the em square of the font. So a value of ‘6’ will offset the mark glyph from the base glyph by 6 percent of the font’s em square.
The preferences for the horizontal placement of the mark glyph can also be set. Selecting ‘On’ for the preference ‘AccentCenterLowest’ will center the accent glyph by the lowest point of the base glyph.
Selecting ‘AccentCenterHighest’ to ‘On’ will center the accent by the highest point of the base glyph.
Selecting both the above preferences to ‘Off’ will center the accent in the width of the base glyph. Selecting both the above preferences to ‘On’ will center the accent by the width of the character slot.
Using Anchor Points to place diacritics
The most accurate and efficient way to build accented characters in FontForge is to use ‘anchor points’.
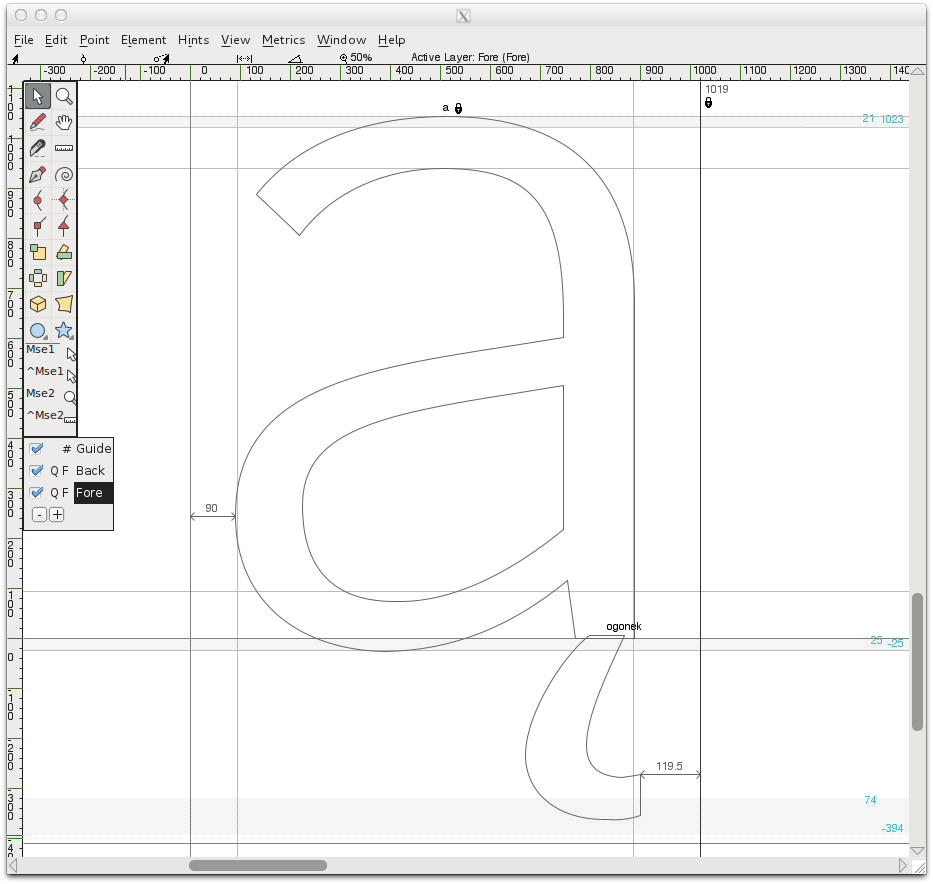
Anchor points allow fine control of the exact positioning of the diacritic mark in relation to each base glyph in the accented characters. So, in the case of the ‘a ogonek’ character, the ‘a’ base glyph will be positioned normally, and the ‘ogonek’ mark glyph will be positioned so that the anchor point of the mark glyph coincides with the anchor point in the base glyph.
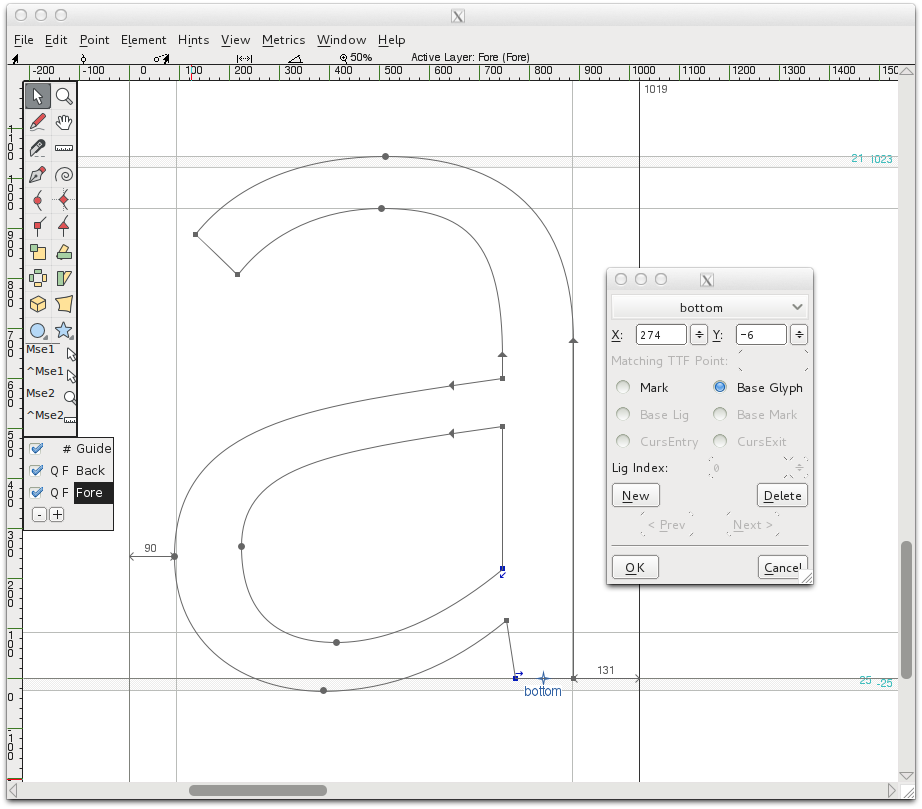
In the example below of creating an ‘a ogonek’ character, an anchor class has been created called ‘bottom’. In the lowercase ‘a’ glyph, the ‘bottom’ anchor is placed at the bottom of the stem of the ‘a’. This is the ‘base glyph’ form of the anchor.
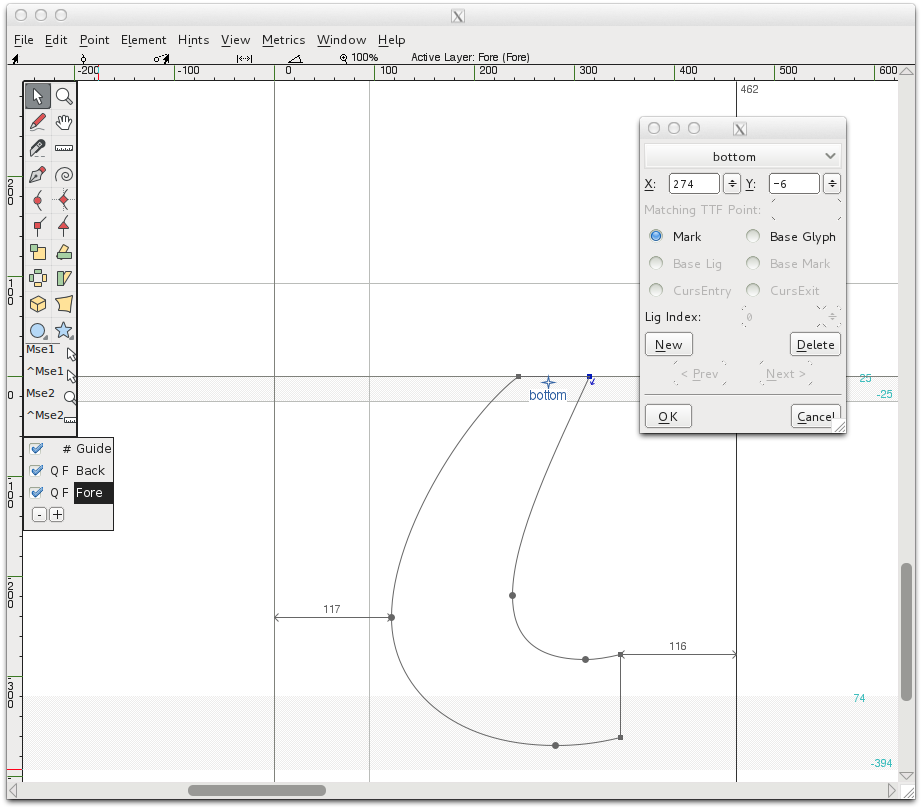
In the ‘ogonek’ glyph the ‘bottom’ anchor is placed at the top of the ogonek glyph, in the form of a ‘mark’ anchor.
Then, when the ‘a ogonek’ character is built (using the ‘Build Accented Character’ function) the ‘bottom’ mark anchor point will be placed at the same location as the ‘bottom’ base anchor point, ensuring that the referenced ogonek glyph is placed correctly at the foot of the stem of the referenced ‘a’ glyph. This exact and automatic placement would not have been possible without using anchor points to position the base and mark glyphs.
Creating anchor points for placing diacritic marks (mark to base positioning)
FontForge uses lookup features know as ‘mark-to-base’ for creating and positioning anchor points. These mark-to-base lookups can be created and edited in the GPOS Lookups section of the Font Info of your font (‘Element > Font Info > Lookups > GPOS’).
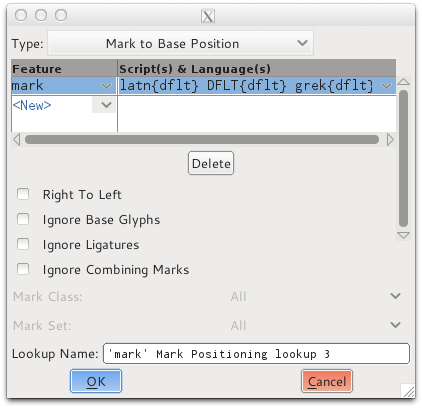
From the GPOS Lookups window, click on ‘Add Lookup’ and choose the Type ‘Mark to Base Position’, then choose ‘Mark Positioning’ from the ‘New’ column of the Feature pane. Click ‘OK’ to close the window.
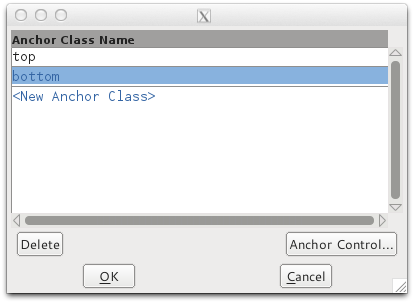
With the new lookup selected, click ‘Add Subtable’. In the resulting window you can create your anchor classes.

In this example, two anchor classes have been created, ‘top’ and ‘bottom’. The ‘top’ anchor class will be used to position diacritic marks that are placed above glyphs, and the ‘bottom’ anchor will be used for positioning marks below glyphs.
To place an anchor with a glyph, simply use the right mouse click in a glyph edit window, and select the function ‘Add Anchor’ from the right-click menu. The dialogue box that appears enables you to assign whether the anchor is a base or mark anchor. The anchor’s position can also be fine-tuned from this dialogue box. Alternatively, the anchor can be moved by being dragged to position with the mouse, or by using the arrow keys. The anchor point can also be edited by right-clicking on the anchor point and choosing ‘get info’ from the mouse click menu.
Control of Anchor Classes
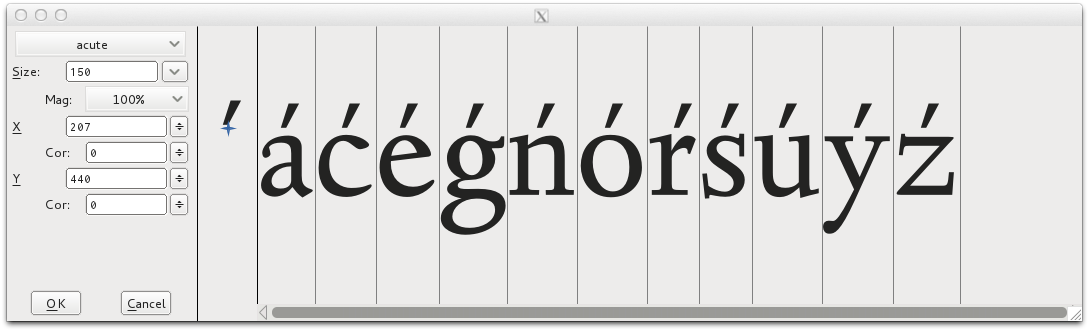
FontForge also contains a useful graphical interface for controlling the position of whole classes of anchor points, enabling the user to fine-tune the position of, for example, all the acute accents at once in a font, or all the anchors in a class contained in characters that reference the lowercase ‘e’. In the examples below we can see how to use this graphical interface to fine-tune the position of all acute accents in a font and a class of anchors across all characters that reference the lowercase ‘e’ glyph.
Once you have created anchor classes within your mark-to-base position lookups and added anchors to some glyphs, you can control these classes from ‘Element > Font Info > Lookups > GPOS’ and then editing a subtable that contains anchor classes. You will then see this window;
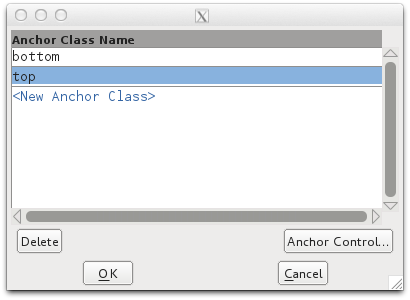
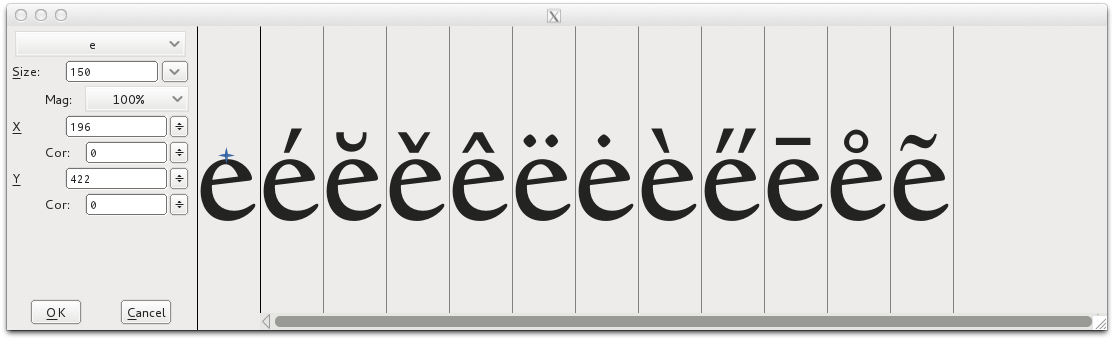
From here, select the class you wish to edit and click on the ‘Anchor Control’ button. You will then be presented with a graphical interface to that class. In the examples below we are editing the control of the ‘top’ class. In the first example, the lowercase ‘e’ has been selected from the ‘Bases’ section of the drop-down menu. When a base glyph is selected, all characters that reference that glyph and contain a ‘top’ base anchor will be displayed in the preview pane. We can then adjust the position of the ‘top’ base anchor to see how it affects the position of all glyphs that contain the ‘top’ mark anchor.
In the second example, below, the ‘acute’ glyph has been selected from the ‘Marks’ section of the drop-down menu. When a mark glyph is selected, then all glyphs that reference the selected glyph and contain a ‘top’ mark anchor will be displayed for preview.